Cámara


[Razón: The page below is incomplete. Desciptions are missing for toggles, sections not filled out. Considering if these options should be displayed in tables instead of lists. Translations may be broken for a bit.]
La cámara es una herramienta dentro del juego que permite a los usuarios hacer fotos para capturar sus experiencias en VRChat.
Cómo acceder
Hay varias formas de acceder a la cámara en VRChat:
- Abre el menú de acción, selecciona "Herramientas" y luego "Cámara".
- Abre el menú rápido y haz clic en la pestaña "Cámara" en la parte inferior. El menú rápido ofrece opciones para todos los modos de cámara.
- Haz doble clic en el botón "Cámara" en la parte inferior del menú rápido. Esto sacará o guardará la cámara de inmediato.
- Open the Action Menu, select Tools, then select Camera.
- Open the Quick Menu and click on the Camera tab on the bottom row. The Quick Menu provides options for all camera modes.
- Double-click the Camera tab on the bottom tab of the Quick Menu. This will immediately take out or put away the camera.
Modos

Los modos de la cámara determinan cómo se comporta al tomar una foto. Hay siete modos que corresponden a diferentes funciones:
- Foto Local
- Al tomarla, captura una foto normal. Este es el modo por defecto.
- Multi Capa
- Tras tomarla, captura una foto y crea multiples imagenes de cada máscara activada. Este modo no soporta enfoque o filtros y puede generar retraso de recuadros.
- Puede crear hasta tres imagenes adicionales (además de la foto regular): "Entorno", "Usuarios" (Combina las máscaras de Usuario Local y Remoto), y la "IU". Las máscaras de "Usuarios" y "IU" se guardan con composición alfa.
- Stream
- Remplaza la vista de escritorio con la vista de la cámara. En modo escritorio, el toggle "Transmisión Spout" aparecerá, permitiendo al usuario recibir la vista de la cámara a través de aplicaciones soportadas.
- El toggle "Transmisión Spout" requiere a las aplicacioens soportar el protocolo Spout para recibir la vista de la cámara.
- Este modo solo esta disponible en PC.
- Galería
- Tras tomarla, una IU aparece permitiendo al usuario hacer zoom, reposicionar y hacer espejo a la foto en un recorte rectangular. "Guardar y aplicar" la guarda en la sección de "Galería de fotos" del "Invetario". Requiere VRC+.
- Ícono de usuario
- Tras tomarla, una IU aparece permietiendo al usuario hacer zoom, reposicionar y hacer espejo a la foto en un recorte circular. "Guardar y aplicar" la guarda en la sección de "Íconos de usuario" del "Inventario" y automáticamente establerecerá el ícono de usuario a ella.
- Pegatina
- Véase también Pegatina para más información detallada.
- Muestra un contorno cuadrado, resaltando el área de recorte. Tras tomarla, la IU de "Crear pegatina" aparece, permitiendo al usuario hacer zoom, reposicionar y hacer espejo a la foto en 6 recortes predeterminados. "Guardar" lo guarda en la sección de "Pegatinas" del "Inventario". Requiere VRC+
- Instantánea
- Véase también Instantáneas para más información detallada.
- Tras tomarla, la IU de instantáneas aparece, permitiendo al usuario editar la nota. "Imprimir y guardar" la guarda a la sección de "Instantáneas" del "Inventario" y automáticamente imprimirá la instantánea dentro del mundo. Requiere VRC+.
- Emoji
- Véase también Emojis para más información detallada.
- Muestra un contorno cuadrado, resaltando el área de recorte. Tras tomarla, la IU de "Crear Emoji" aparece, permitiendo al usuario escoger animaciones, zoom, reposicionar y hacer espejo a la foto con seis recortes predeterminados. "Guardar" la guarda a la sección de "Emojis" del "Inventario". Requiere VRC+.
- Opciones animadas requieren que el usuario tome una foto por cada recuadro (4 o 16)
- Emoji (1)
- Animado (4)
- Animado (16)
Estos tres "modos" no son accesibles por medio del botón de "Modo de la cámara", sino más bien por otros medios:
- Lanzar Dron
- Ver también Dron Cámara para más información detallada.
- Saca el Dron Cámara.
- Captura de pantalla
- Toma una foto sin elementos HUD . Capturas en 1920x1080 por defecto, a menos de ser cambiadas en config file.
- Invitación con foto
- Invitaciones Invitación/Solicitud o Respuestas Invitación/Solicitud pueden ser enviadas con una imagen. Tras tomarla, una IU aparece permitiendo al usuario hacer zoom, reposicionar y hacer espejo a la foto en un recorte rectangular. "Guardar y aplicar" lo adjunta a invitaciones/respuestas. Requiere VRC+.
Opciones

Las opciones consisten en los toggles que aparecen alrededor del marco de la cámara. Algunas opciones pueden ser controladas tanto por la IU como por el Menú.
UI
The UI toggles are toggles that are on the on center, left or right sides of the camera frame.
Default
- Close
- Closes the camera.
- Orientation
- Switch between landscape and portrait orientation.
- Flip
- Flips the camera. When Anchor is set to "Default", the camera lens turns around 180°, otherwise the image is flipped horizontally.
- Zoom
- Zooms the camera in or out. The camera FOV can be zoomed from 20 to 150, with 45 being the default value.
- Exposure
- Changes the exposure (brightness) of the image. The exposure can be set from -10 to 4, with 0 being the default value.
- Reset
- Resets the zoom and exposure slides to their default values.
- Info
- Shows the status of different camera toggles. Click on a status to quickly cycle through options.
- Camera Mode
- Cycles through the Photo, Stream, and Multi Layer camera modes.
- Pins
- Cycles through pins 1, 2 and 3.
- Focus
- Cycles through Full Auto, Semi Auto, and Manual focuses.
- Filters
- Cycles through the Blueprint, Glitch, Speed, Hypno, Pixelate, Sketch, Sparkle, Trippy, and Olde camera filters.
Toggle
- Fly Speed
- Determines how fast the camera moves in Fly mode. Values range from 0.1 to 15, with 3 being the default.
- Slider shown only when using Desktop mode or when the Flying toggle is on.
- Turn Speed
- Determines how fast the camera rotates in Fly mode. Values range from 0.1 to 5, with 1 being the default.
- Slider shown only when using Desktop mode or when the Flying toggle is on.
- Smoothing Strength
- Determines how much smoothing is applied to camera movement. Values range from 0.1 to 10, with 5 being the default.
- Slider shown only when using the Smoothed toggle.
- Horizontal Offset
- Determines the horizontal offset from the center of the image when using Look-At-Me. Values range from -25 to 25, with 0 being the default. Using the Auto Level Roll toggle will disable this slider.
- Slider shown only when using the Look-At-Me toggle.
- Vertical Offset
- Determines the vertical offset from the center of the image when using Look-At-Me. Values range from -25 to 25, with 0 being the default.
- Slider shown only when using the Look-At-Me toggle. Using the Auto Level Pitch toggle will disable this slider.
- Focal Distance
- Determines the depth of field's focal distance.
- Slider shown only when using the Manual focus toggle.
- Aperture
- Determines the depth of field's aperture.
- Slider shown only when using the Semi Auto or Manual focus toggles.
- Green Screen
- Displays sliders to adjust the color of the green screen mask. The sliders are Hue, Saturation, and Lightness.
- Sliders shown only when using the GreenScreen toggle.
- Hue
- Saturation
- Lightness
- Duration
- Determines the duration of new dolly points when using time-based motion.
- Slider shown only when the Dolly toggle is selected.
Menu
The Menu toggles are toggles that are below the camera frame.
- Take Photo
- Takes a photo.
- Timed (5s)
- Takes a photo with a five-second delay. Remote users will see a circular indicator around the lens winding down to when the photo is taken. Photo can be cancelled before the five seconds has passed.
- Camera Mode
- Determines how the camera behaves when taking photos. See the Modes section above to view all options
- Flying
- Allows the camera to fly within the world. Movement is applied to the camera instead of the avatar. When flying normally, the camera is limited to a 15 meter? radius, with Camera Dolly, the radius is increased to 150 meters?, and with the Camera Drone, the range is unlimited.
- Toggle appears only on VR & Mobile devices.
- Spout Stream
- Allows the camera view to be received through supported applications. This requires applications to support the Spout protocol.
- The "Stream" camera mode must be selected for it to appear.
- Audio From Camera
- Audio heard will be from the camera position instead of the avatar.
- The "Stream" camera mode must be selected for it to appear.
- Anchor
- Determines where the camera is attached.
- Default
- Attached to the user.
- Local
- Follows user movement but not head movement.
- World
- Attached to the world, independent of user movement.
- Behavior
- Desc
- Smoothed
- Stabilizes video for smoother footage.
- Look-At-Me
- Camera follows where your head is facing.
- Auto Level Roll (VR)
- two colons plus definition
- Auto Level Pitch
- two colons plus definition
- Roll When Flying (VR)
- two colons plus definition
- Trigger Takes Photos (VR)
- Only works when the camera mode is not local photo
- Focus
- Controls the focus mode.
- Off
- two colons plus definition
- Full Auto
- Automatically sets the aperture and focal distance.
- Semi Auto
- Allows adjustment of aperture only. (Aperture slider appears on right)
- Manual
- Allows adjustment of both aperture and focal distance. (Focal Distance, Aperture slider appears on right)
- Show
- (shows focus visualizer)
- Pins
- Saves camera presets.
- Anchor, Behavior, Mask, and Filters can be saved to pins.
- Pin 1
- Pin 2
- Pin 3
- Mask
- Determines which layers are included in pictures.
- Local User
- Includes the user and their avatar.
- Remote User
- Includes other users.
- World
- Includes the world environment.
- GreenScreen
- Replaces the environment with a green screen.
- UI
- Includes UI elements like the radial menu and camera interface.
- Items
- Includes items placed by users in the world.
- Dolly
- See also Camera Dolly for more detailed information.
- This option is only available on PC & Android (Standalone VR).
- Add
- two colons plus definition
- Play (3s)
- two colons plus definition
- Clear Last
- two colons plus definition
- Clear All
- (are u sure)
- Advanced
- Desc
- Export
- (export path relative to world or local)
- Import
- (import path)
- Show Paths
- Desc
- Lens Visibility
- Sets how the camera is rendered within the world.
- Off
- Shows only a small light.
- Ghost
- Displays a light blue transparent camera lens.
- Solid
- Displays a solid camera lens.
- Filters
- Adds visual filters to the camera. Only one filter can be active at a time.
-
 None
-
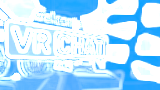 Blueprint
-
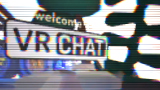 Glitch
-
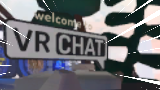 Speed
-
 Hypno
-
 Pixelate
-
 Sketch
-
 Sparkle
-
 Trippy
-
 Olde


- Photo Resolution
- Changes the resolution of taken photos.
- 720p
- 1080p
- 1440p
- 2160p
- 4320p
- Config File
- Applies the resolution specified within the config file.
- Stream Resolution
- Changes the resolution of the Spout Stream output.
- 720p
- 1080p
- 1440p
- 2160p
- Config File
- Applies the resolution specified within the config file.
- Lock
- Disables camera pickup interaction. VR Only.
- Grid
- Displays a rule of thirds grid on the camera.
- Save Metadata
- Attaches metadata to photos when taken.
- Metadata attached includes: Author display name, Author ID, World display name, and, World ID. If the photo is taken in a private world, the world ID, and world display is not attached.
Behavior
Indicators
Red Beam
When a user has their camera out, a red beam will projected upwards and downwards from their camera position. In addition, it will also project a red quad indicating the what direction the camera is facing. These red beams are only visble when the Quick Menu is open.
Timed
Audio From Camera
Acceder a las fotos guardadas
- Los sistemas operativos Windows almacenarán las fotos de VRChat usando la ruta de carpeta predeterminada de "Imágenes":
C:/Usuarios/(Propietario)/Imágenes/VRChat. Las fotografías se ordenarán por mes y año. En las versiones de escritorio y PCVR de VRChat, al abrir la pestaña "Cámara" en el menú rápido y al seleccionar "Abrir carpeta de fotos", se abrirá directamente el explorador de archivos en esa ruta.
- Los usuarios de Steam pueden acceder a sus capturas de pantalla de Steam, separadas de las fotos de VRChat, usando la ruta de carpeta predeterminada:
C:/Archivos de programa (x86)/Steam/userdata/XXXXXXXXX/760/remote/438100/screenshots.
- Los usuarios de Quest Standalone pueden acceder a sus fotos a través de la aplicación "Archivos" de Quest en el panel del sistema, o mediante la aplicación Meta Horizon en su teléfono u otro dispositivo si está sincronizado.
- Los dispositivos Android y iOS pueden acceder a sus fotos de VRChat mediante la aplicación "Galería" o a través de la aplicación "Archivos" del dispositivo.


